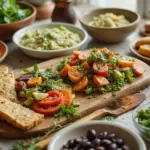
The Mediterranean diet has me dreaming of sunny days and delicious meals. With its fresh ingredients and vibrant flavors, it’s hard not to crave a Mediterranean feast. But what if you have to skip the dairy? No need to worry! I created this post just for you.
If you’re looking for delicious meals that fit a dairy-free lifestyle, you’re in the right place. Whether you’re a long-time follower of the Mediterranean diet or just starting to explore it, you’ll find something here that excites your taste buds. You care about making tasty, healthy choices, and you want meals that are easy to prepare, satisfying, and full of flavor.
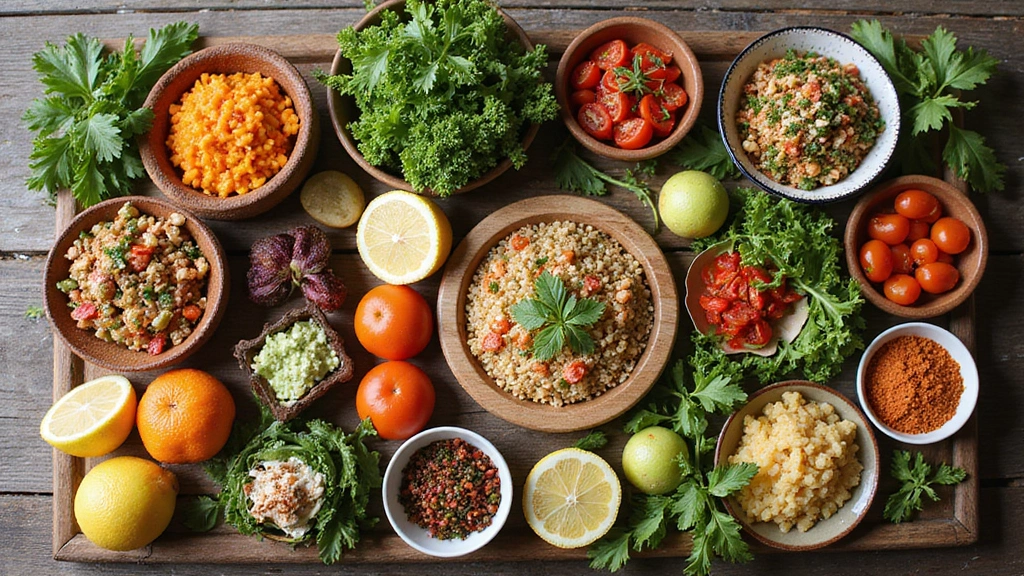
In this post, I pulled together 25 dairy-free Mediterranean diet recipes that are simply amazing. You’ll discover meals that are light yet filling, bursting with fresh produce, and loaded with herbs and spices. From hearty pastas to zesty salads, each recipe offers something unique. Plus, they’re all designed to fit seamlessly into your busy life, making meal prep a breeze.
Get ready to enjoy delicious dishes that keep you energized and satisfied. With these recipes, you won’t miss the dairy at all. Let’s dive into the wonderful world of Mediterranean flavors, all while keeping it dairy-free!
1. Quinoa Tabbouleh Salad

Discover a refreshing twist on a classic favorite with this Quinoa Tabbouleh Salad. By swapping traditional wheat for quinoa, you get a protein-packed dish that bursts with flavor. Fresh parsley, mint, and juicy tomatoes come together in a vibrant mix, drizzled with olive oil and brightened by zesty lemon juice. This salad is not just delicious; it’s also a fantastic post-workout meal, providing the nutrients your body craves after exercise.
Imagine sitting down to a bowl of this colorful salad, each bite offering a delightful crunch and a burst of freshness. It’s perfect for lunch or as a side dish at dinner. Plus, it’s simple to make and can be prepared in just 35 minutes!
Recipe Overview:
– Servings: 4
– Prep Time: 20 minutes
– Cook Time: 15 minutes
– Total Time: 35 minutes
– Calories: 180
Ingredients:
– 1 cup quinoa, rinsed
– 2 cups water
– 2 cups finely chopped parsley
– 1 cup diced tomatoes
– 1/2 cup finely chopped mint
– 1/4 cup olive oil
– Juice of 2 lemons
– Salt and pepper to taste
Instructions:
1. In a medium pot, combine the quinoa and water. Bring it to a boil, then cover and reduce to a simmer for 15 minutes.
2. Once cooked, fluff the quinoa with a fork and let it cool down.
3. In a large bowl, mix the cooled quinoa with parsley, tomatoes, mint, olive oil, lemon juice, salt, and pepper.
4. Serve chilled or at room temperature for a refreshing dish.
Pro Tip: For the best flavor, always use fresh herbs!
FAQs:
– Can I use other grains?
Yes! You can substitute bulgur or farro for a different texture and taste.
This quinoa tabbouleh salad is not only a treat for your taste buds but also a healthy addition to your meal plan. Enjoy it at home or share it at gatherings. You’ll impress your friends and family with its fresh, delicious flavors!
Quinoa Tabbouleh Salad
Editor’s Choice

Viva Naturals Organic Quinoa, 4 lb – Pre-Washed Whole Grain, Plant Prote…

Pompeian Robust Extra Virgin Olive Oil, Contains Polyphenols, First Cold…

Ahopegarden Indoor Garden Hydroponics Growing System: 10 Pods Plant Germ…
2. Mediterranean Chickpea Bowl

Craving a quick, nourishing meal that leaves you satisfied? This Mediterranean Chickpea Bowl is your perfect post-workout option. With its mix of fresh greens, roasted chickpeas, and vibrant veggies, it’s a feast for your taste buds. Imagine the crunch of cucumbers paired with the sweetness of cherry tomatoes, all drizzled in creamy tahini sauce. It’s not just delicious; it’s packed with protein and nutrients to fuel your day.
Recipe Overview:
– Servings: 2
– Prep Time: 10 minutes
– Cook Time: 20 minutes
– Total Time: 30 minutes
– Calories: 350
Ingredients:
– 1 can chickpeas, drained and rinsed
– 1 teaspoon smoked paprika
– 1 teaspoon garlic powder
– 4 cups mixed greens
– 1 cup halved cherry tomatoes
– 1 cucumber, diced
– 1/2 cup olives, sliced
– 1/4 cup tahini
– Juice of 1 lemon
Instructions:
1. Preheat your oven to 400°F (200°C). Toss the chickpeas with smoked paprika and garlic powder. Spread them on a baking sheet and roast for 20 minutes until crispy.
2. In a large bowl, layer your mixed greens. Add the roasted chickpeas, cherry tomatoes, cucumber, and olives on top.
3. In a small bowl, whisk together the tahini and lemon juice. Drizzle this creamy goodness over your bowl for a burst of flavor.
Feel free to customize this recipe with any veggies you have on hand. Love bell peppers? Toss them in! Want to add some avocado? Go for it!
FAQs:
Can I use dried chickpeas? Yes, just soak them overnight and cook until tender before using.
This bowl is a delightful way to enjoy a healthy meal packed with flavors and colors, making it great for lunch or dinner. Enjoy every bite!
Mediterranean Chickpea Bowl
Editor’s Choice

365 by Whole Foods Market, Organic Tahini, 16 Ounce

Amazon Grocery, Canned Garbanzo Beans, 15.5 Oz (Previously Amazon Fresh,…

3. Eggplant Moussaka

If you’re craving a hearty, comforting meal, look no further than this dairy-free eggplant moussaka. It’s a layered delight that will satisfy your taste buds. Instead of the usual béchamel sauce, we use a creamy cashew blend that adds richness without any dairy. You’ll enjoy the combination of roasted eggplant, spiced lentils, and savory tomato sauce that makes this dish perfect for dinner or meal prep. Plus, it’s simple to make!
Let’s dive into the details of this delicious recipe. It takes about 30 minutes to prep and one hour to cook, making it a great option for a busy weeknight. With just a few fresh ingredients, you can create a meal that feels special. Gather your ingredients and get ready for a culinary adventure that brings the flavors of the Mediterranean to your table.
Recipe Overview:
– Servings: 6
– Prep Time: 30 minutes
– Cook Time: 1 hour
– Total Time: 1 hour 30 minutes
– Calories: 400 per serving
Ingredients:
– 2 eggplants, sliced
– 1 cup lentils, cooked
– 1 can diced tomatoes
– 1 onion, chopped
– 2 garlic cloves, minced
– 1 cup raw cashews, soaked
– 1/2 cup vegetable broth
– Olive oil, salt, and pepper to taste
Instructions:
1. Preheat your oven to 375°F (190°C). Arrange the eggplant slices on a baking sheet and drizzle with olive oil. Roast for about 25 minutes until tender.
2. In a skillet, sauté the chopped onion and minced garlic until they become translucent. Add in the cooked lentils and diced tomatoes, stirring well.
3. For the cashew cream, blend the soaked cashews with vegetable broth until smooth and creamy.
4. In a baking dish, layer the roasted eggplant, the lentil mixture, and the cashew cream. Repeat until all ingredients are used, finishing with a layer of cashew cream on top.
5. Bake in the oven for 30 minutes. Let it sit for a bit before slicing. This allows for cleaner cuts and enhances the flavors.
Wondering if you can add meat? You can easily mix in ground turkey or beef for an extra protein boost. Enjoy your delicious moussaka, full of Mediterranean charm and flavors!
Eggplant Moussaka
Editor’s Choice

Yupik Organic Raw Cashews, 2.2 lb (35.2 oz), Kosher, Gluten-Free, Non-GM…

365 by Whole Foods Market, Organic Low Sodium Vegetable Broth, 32 Fl Oz

Pompeian Extra Virgin Olive Oil Variety Pack – Smooth, Robust, Naturally…
4. Roasted Red Pepper Hummus

Looking for a delicious snack that fits your dairy-free Mediterranean diet? Try this Roasted Red Pepper Hummus. It’s not just a dip; it’s a flavor explosion! The smoky sweetness of roasted red peppers pairs perfectly with creamy chickpeas, making it a standout choice for any meal or gathering. Whether you’re hosting friends or just need a quick bite, this hummus will impress.
Serve it alongside crunchy fresh veggies or warm whole-grain pita for a delightful snack. This dip is packed with protein and healthy fats, perfect for fueling your day or prepping for a workout. Plus, it’s easy to whip up in just 30 minutes!
Here’s how to make it:
Recipe Overview:
– Servings: 6
– Prep Time: 10 minutes
– Cook Time: 20 minutes
– Total Time: 30 minutes
– Calories: 100 per serving
Ingredients:
– 1 can chickpeas, drained
– 2 roasted red peppers
– 2 tablespoons tahini
– 1 tablespoon lemon juice
– 1 garlic clove
– Salt and pepper to taste
Instructions:
1. In a food processor, add chickpeas, roasted peppers, tahini, lemon juice, garlic, salt, and pepper.
2. Blend until smooth. If it’s too thick, add a splash of water to reach your desired consistency.
3. Transfer to a serving bowl and enjoy with veggies or pita chips!
Feel free to experiment! Try different types of peppers for a unique twist on this classic. You can store leftover hummus in the fridge for up to a week, making it a convenient option for busy days. Enjoy this vibrant dip, and share it with friends or keep it all to yourself!
• Blend until creamy for the best texture
• Store in an airtight container in the fridge
• Pair with colorful veggies for extra crunch
• Experiment with spices like cumin for a kick
Fun fact: Roasted red pepper hummus comes together in under 15 minutes with 4 simple ingredients. It’s a staple in mediterranean diet recipes dairy free, fueling workouts with plant protein and fiber and turning snack time into performance fuel.
Roasted Red Pepper Hummus
Editor’s Choice

Hamilton Beach Food Processor & Vegetable Chopper for Slicing, Shredding…
365 by Whole Foods Market, Organic Tahini, 16 Ounce

Airtight Food Storage Containers with Lids, Vtopmart 24 pcs Plastic Kitc…
5. Zucchini Noodles with Pesto

Looking for a delightful way to enjoy a low-carb meal? Zucchini noodles with pesto are your answer! This dish is a fun twist on traditional pasta, bringing fresh Mediterranean flavors right to your plate. The vibrant basil pesto adds a burst of flavor with each bite, inviting you to savor every mouthful.
You’ll love how easy it is to whip up this dish in just 20 minutes. It’s light yet satisfying, making it ideal for anyone wanting to refuel after a workout without feeling weighed down. Picture this: fresh basil, aromatic garlic, and crunchy pine nuts come together in a creamy pesto that coats the tender zucchini noodles perfectly. Plus, you can add cherry tomatoes for a juicy sweetness that elevates the dish even more!
Let’s dive into the recipe:
Recipe Overview:
– Servings: 2
– Prep Time: 15 minutes
– Cook Time: 5 minutes
– Total Time: 20 minutes
– Calories: 300
Ingredients:
– 2 zucchinis, spiralized
– 1 cup fresh basil leaves
– 1/4 cup pine nuts
– 2 tablespoons olive oil
– 1 clove garlic
– Salt and pepper to taste
Instructions:
1. Start by making the pesto. In a food processor, blend the basil, pine nuts, olive oil, garlic, salt, and pepper until smooth.
2. Heat a pan over medium heat and sauté the zucchini noodles for 2-3 minutes, just until they soften slightly.
3. Pour the pesto over the noodles and toss to combine. Serve immediately.
Feel free to add cherry tomatoes for extra flavor and color!
FAQs: Can you keep leftovers? Zucchini noodles taste best fresh, so try to enjoy them right away for the best experience!
Zucchini Noodles with Pesto
Editor’s Choice

Brieftons 5-Blade Vegetable Spiralizer: Strongest-Heaviest Spiral Slicer…
Hamilton Beach Food Processor & Vegetable Chopper for Slicing, Shredding…

Filippo Berio Pesto, Organic Classic Basil, 6.7 Ounce Glass Jar, Gluten …
6. Stuffed Bell Peppers

Brighten your meals with these Stuffed Bell Peppers. Not only are they a feast for the eyes with their vibrant colors, but they also pack a nutritious punch. Each pepper is filled with a savory blend of quinoa, black beans, and corn, making it a hearty dish that satisfies hunger. Baking them brings all the flavors together, creating a delicious experience that’s ideal for lunch or dinner.
Imagine cutting into a warm, tender pepper and discovering the delightful combination of spices and wholesome ingredients inside. This dish is not just filling; it’s also a canvas for your creativity. You can dress it up with toppings like avocado or fresh herbs, making it even more appealing.
Ready to make these stuffed beauties? They are budget-friendly too! You can easily swap out quinoa for brown rice or whatever grain you have on hand. This flexibility means you can customize the recipe to fit your pantry and taste preferences, ensuring every bite is just right for you.
Here’s what you need to whip up this dish:
Ingredients:
– 4 bell peppers
– 1 cup cooked quinoa
– 1 can black beans, drained
– 1 cup corn
– 1 teaspoon cumin
– 1 teaspoon chili powder
– Salt and pepper to taste
Instructions:
1. Preheat your oven to 375°F (190°C). Cut the bell peppers in half and remove the seeds.
2. In a mixing bowl, combine the cooked quinoa, black beans, corn, cumin, chili powder, salt, and pepper.
3. Stuff each halved pepper with this mixture, pressing gently to pack them in.
4. Place the stuffed peppers into a baking dish and bake for 30 minutes, or until the peppers are tender and slightly browned.
For an extra creamy touch, top with sliced avocado after baking!
FAQs:
– Can I use other grains? Yes, brown rice works great!
– Can I add other veggies? Absolutely! Feel free to mix in any chopped vegetables you enjoy.
– How do I store leftovers? Keep them in an airtight container in the fridge for up to 3 days.
– Can I freeze them? Yes! Just bake them first, let them cool, and then freeze.
Enjoy your stuffed bell peppers, packed with flavor and nutrients!
Stuffed Bell Peppers
Editor’s Choice

Anchor Hocking Glass Baking Dishes for Oven, 2 Piece Set (2 Qt & 3 Qt Gl…


7. Falafel Wraps

Falafel wraps are your go-to for quick lunches or speedy dinners. They’re not just easy to make; they’re also deliciously satisfying. Imagine biting into a crispy falafel, perfectly golden on the outside and wonderfully soft on the inside. Each chickpea ball bursts with flavor from fresh herbs and spices. When you wrap them in a whole grain pita with crisp mixed greens, cool cucumber, and a drizzle of creamy tahini, you create a meal that’s nourishing and energizing—perfect for fueling your workouts or chasing after a busy day.
Ready to whip up this tasty dish? Here’s how you can make your own falafel wraps at home. It’s simple, budget-friendly, and so rewarding. Plus, you can easily customize the fillings to suit your taste. Whether you’re packing lunch for work or making a quick dinner, these wraps will impress your friends and family.
Recipe Overview:
– Servings: 4
– Prep Time: 15 minutes
– Cook Time: 20 minutes
– Total Time: 35 minutes
– Calories: 250
Ingredients:
– 1 can chickpeas, drained
– 1/2 cup fresh parsley, chopped
– 1/4 cup flour
– 1 teaspoon cumin
– 1 teaspoon coriander
– Salt and pepper to taste
– Whole grain pita bread
– Mixed greens and cucumber for serving
– Tahini for drizzling
Instructions:
1. In a food processor, combine chickpeas, parsley, flour, cumin, coriander, salt, and pepper. Blend until smooth.
2. Shape the mixture into small balls.
3. Heat olive oil in a skillet over medium heat. Fry the falafel balls until they turn golden brown on all sides, about 3-5 minutes.
4. For a healthier option, preheat your oven to 375°F (190°C) and bake the falafel for 20-25 minutes.
5. To serve, place the falafel in pita bread and fill with mixed greens and cucumber. Drizzle with tahini.
FAQs:
– Can I freeze falafel? Yes! You can freeze uncooked falafel balls. Just bake them when you’re ready to enjoy.
With this recipe, you’ll have a delightful meal that’s full of flavor and fun. Enjoy your falafel wraps as a healthy choice that everyone will love!
Fun fact: Falafel wraps power your day with plant protein and fiber—two to three falafel balls plus greens fuel workouts without dairy. For mediterranean diet recipes dairy free, this quick wrap is tasty, satisfying, and ready in minutes.
Falafel Wraps
Editor’s Choice
Hamilton Beach Food Processor & Vegetable Chopper for Slicing, Shredding…

Toufayan Multi Grain Pita Bread (3 Pack, 18 Pitas Total)
365 by Whole Foods Market, Organic Tahini, 16 Ounce
8. Grilled Vegetable Skewers

Grilled vegetable skewers are a fantastic way to brighten up your summer meals. These colorful bites are not just delicious; they’re also packed with nutrients. Imagine tender zucchini, sweet bell peppers, and juicy cherry tomatoes, all kissed by the grill’s heat. The charred edges enhance their natural sweetness, making every bite a burst of flavor. You can serve these skewers alongside your favorite protein or toss them in a refreshing salad for an extra kick.
Ready to make them? Here’s a simple recipe to get you started. It takes just 30 minutes from prep to plate! Plus, these skewers are a great option for outdoor gatherings.
Recipe Overview:
– Servings: 4
– Prep Time: 15 minutes
– Cook Time: 15 minutes
– Total Time: 30 minutes
– Calories: 150
Ingredients:
– 1 zucchini, sliced
– 1 bell pepper, chopped
– 1 red onion, cut into chunks
– 1 cup cherry tomatoes
– 1/4 cup olive oil
– Salt and pepper to taste
– Your favorite herbs (like oregano or thyme)
Instructions:
1. In a large bowl, combine the zucchini, bell pepper, red onion, and cherry tomatoes.
2. Drizzle the olive oil over the veggies and sprinkle with salt, pepper, and herbs. Toss until everything is well coated.
3. Thread the marinated vegetables onto skewers.
4. Preheat your grill to medium-high heat. Grill the skewers for about 10-15 minutes, turning occasionally, until the veggies are tender and slightly charred.
Tip: Soak wooden skewers in water for 30 minutes before grilling to prevent burning!
FAQs:
– Can I use frozen veggies? Fresh vegetables give the best flavor and texture for grilling.
– What herbs work well? Experiment with your favorite herbs to create unique flavors!
These grilled vegetable skewers not only look great on your plate, but they also make your meals healthier and more enjoyable. Perfect for summer BBQs or a quick weeknight dinner, you’ll love the ease and taste of this recipe!
Grilled Vegetable Skewers
Editor’s Choice

HOPELF 12″ Natural Bamboo Skewers for BBQ,Appetiser,Fruit,Cocktail,Kabob…

AOZITA 17oz Glass Olive Oil Bottle Dispenser – 500ml Green Oil and Vineg…

9 Herb Indoor Garden Kit – Unique Kitchen Gift for Women, Men, Mom, Frie…
9. Lentil Soup

Warm up your day with a delightful bowl of lentil soup! This nourishing dish is not only packed with protein but also bursting with flavors that keep you satisfied. It’s perfect for athletes looking to refuel after a workout or anyone craving a comforting meal. With a mix of fresh vegetables and spices simmered together, this soup offers a hearty experience that warms the soul.
Pair it with whole grain bread to make it a complete meal. The crunchy texture of the bread complements the smoothness of the soup beautifully. Plus, this recipe is simple and quick, making it a great choice for busy weeknights.
Let’s dive into what you’ll need to make this delicious lentil soup.
Recipe Overview:
– Servings: 6
– Prep Time: 10 minutes
– Cook Time: 30 minutes
– Total Time: 40 minutes
– Calories: 220 per serving
Ingredients:
– 1 cup lentils, rinsed
– 1 onion, chopped
– 2 carrots, diced
– 2 celery stalks, diced
– 4 cups vegetable broth
– 1 teaspoon cumin
– Salt and pepper to taste
Instructions:
1. In a large pot, heat a splash of olive oil over medium heat. Sauté the chopped onion, carrots, and celery until they soften and become fragrant.
2. Stir in the rinsed lentils, vegetable broth, cumin, salt, and pepper. Bring the mixture to a boil, then reduce the heat.
3. Let it simmer gently for about 30 minutes, or until the lentils are tender. If you like a smoother texture, use an immersion blender to puree part of the soup.
Feel free to experiment with this recipe! You can add diced chicken or sausage for extra protein if you wish.
This lentil soup is a fantastic way to nourish your body and enjoy a warm, filling meal any day of the week. Enjoy every spoonful!
• Rinse lentils well before cooking
• Add garlic for extra flavor
• Top with fresh herbs like parsley or cilantro
• Serve with whole grain bread for a hearty meal
Lentil Soup
Editor’s Choice

KitchenAid Variable Speed Corded Hand Blender KHBV53, Contour Silver

COLLEGE INN 100% Natural Garden Vegetable Broth, 32 oz Carton (Pack of 6)

Dave’s Killer Bread 21 Whole Grains & Seeds Thin-Sliced, Whole Grain Org…
10. Sweet Potato and Black Bean Tacos

Get ready for a flavor fiesta with these Sweet Potato and Black Bean Tacos! Nestled in soft corn tortillas, this dish combines the sweetness of roasted sweet potatoes with the robust taste of black beans. It’s a satisfying meal that’s not only hearty but also packed with nutrients. Top them off with creamy avocado and zesty salsa for an unforgettable dinner. These tacos are perfect for meal prep or a cozy weeknight dinner.
Here’s everything you need to whip up this delicious dish:
Recipe Overview:
– Servings: 4
– Prep Time: 10 minutes
– Cook Time: 25 minutes
– Total Time: 35 minutes
– Calories: 320 per serving
Ingredients:
– 2 sweet potatoes, peeled and diced
– 1 can black beans, rinsed and drained
– 1 teaspoon cumin
– Corn tortillas
– Avocado and salsa for topping
– Fresh lime for a splash of flavor
Instructions:
1. Preheat your oven to 400°F (200°C). Toss the diced sweet potatoes in olive oil and sprinkle with cumin. Spread them out on a baking sheet and roast for about 25 minutes until tender.
2. While the sweet potatoes are roasting, warm the corn tortillas in a skillet over medium heat until soft.
3. Assemble your tacos by layering roasted sweet potatoes, black beans, slices of avocado, and a generous scoop of salsa.
4. Squeeze fresh lime juice on top for that irresistible zing!
Feel free to switch up the toppings based on your mood. Maybe some fresh cilantro or a sprinkle of chili flakes? Experimenting makes cooking fun!
FAQs:
– Can I use flour tortillas? Yes, but corn tortillas are gluten-free and add a nice texture.
– What can I add for extra protein? Consider adding grilled chicken or quinoa for a heartier meal!
Enjoy these tacos at your next gathering or keep them for yourself. They’re sure to impress!
Sweet Potato and Black Bean Tacos
Editor’s Choice

365 by Whole Foods Market, Organic White Corn Tortilla Chips Thin and Cr…

Amazon Grocery, Ground Cumin, 2.6 Oz (Previously Happy Belly, Packaging …
11. Olive Oil Cake

This delightful olive oil cake is a true gem in the world of dairy-free desserts. With its moist texture and rich flavor, it perfectly captures the essence of Mediterranean cuisine. Imagine slicing into a fluffy cake that’s infused with the bright zest of lemon and the smooth richness of high-quality olive oil. It’s an ideal treat to enjoy after a hearty meal or to impress guests at your next dinner party.
Pair this cake with fresh, seasonal fruits to enhance its flavors. You might serve it with succulent strawberries or ripe peaches, adding a refreshing touch. Pinterest boards are buzzing with this trendy dessert, and it’s no wonder why—it’s simple to make and utterly delicious.
Now, let’s get into how you can create this masterpiece in your own kitchen. Preparing this cake is a breeze, and it won’t break the bank. You’ll find that the ingredients are both accessible and affordable, making it perfect for both everyday celebrations and special occasions.
Here’s the recipe you need:
Ingredients:
– 1 cup olive oil
– 1 cup sugar
– 3 large eggs
– 2 cups all-purpose flour
– 1 teaspoon baking powder
– Zest of 1 lemon
Instructions:
1. Preheat your oven to 350°F (175°C).
2. In a mixing bowl, whisk together the olive oil and sugar until well combined.
3. Add the eggs one at a time, mixing until smooth.
4. In another bowl, combine the flour, baking powder, and lemon zest. Gradually stir this dry mix into the wet ingredients until just combined.
5. Pour the batter into a greased cake pan and bake for about 30 minutes, or until a toothpick comes out clean.
6. Let it cool slightly before serving. Dust with powdered sugar for an extra touch of sweetness.
Enjoy this cake as a delightful dessert that brings a slice of the Mediterranean right to your table!
• Use high-quality olive oil for the best flavor
• Pair with fresh fruits for a vibrant finish
• Dust with powdered sugar for a lovely presentation
• Store leftovers in an airtight container for freshness
Olive Oil Cake
Editor’s Choice
Pompeian Robust Extra Virgin Olive Oil, Contains Polyphenols, First Cold…

King Arthur Measure for Measure Gluten-Free Flour: All-Purpose 1:1 Subst…

365 by Whole Foods Market, Organic Powdered Sugar, 24 Ounce
12. Greek Salad with Avocado

This Greek Salad with Avocado offers a fresh twist on a beloved classic. Packed with colorful ingredients and creamy avocado, it’s a delightful way to enjoy a healthy meal. The crisp cucumbers and juicy tomatoes burst with flavor, while olives bring a briny touch. Adding avocado not only gives a rich texture but also provides healthy fats that energize you throughout the day. Dressed simply with olive oil and lemon juice, this salad is quick to prepare and satisfying to eat.
Let’s get into the details! This recipe serves four and takes just 10 minutes to whip up. It’s perfect for lunch, a light dinner, or as a side at your next gathering. Plus, it’s dairy-free, making it suitable for various dietary needs. If you want to boost your protein, consider adding grilled chicken or chickpeas for a hearty option.
Ingredients:
– 2 cups diced cucumbers
– 2 cups halved cherry tomatoes
– 1/2 cup olives (your choice)
– 1 ripe avocado, diced
– Juice of 1 lemon
– Olive oil to taste
– Salt to taste
Instructions:
1. In a large mixing bowl, combine the cucumbers, cherry tomatoes, olives, and diced avocado.
2. Squeeze the lemon juice over the salad and drizzle with olive oil.
3. Season with salt to taste and toss everything gently to combine.
4. Serve right away for the best flavor and freshness.
Feel free to add your favorite herbs, like parsley or oregano, for an extra layer of taste. This salad is not only a feast for the eyes but also a delicious way to embrace the Mediterranean diet!
FAQs:
– Can I use feta cheese? Sure, but then it won’t be dairy-free!
– How long can I store leftovers? It’s best enjoyed fresh, but you can keep it in the fridge for a day.
Fun fact: Greek Salad with Avocado fits perfectly into Mediterranean diet recipes dairy free, packing nearly 15–20 grams of healthy fats per serving from olive oil and avocado. Those fats fuel workouts and support faster recovery for athletes. It’s a simple, dairy-free twist that keeps you energized all day.
Greek Salad with Avocado
Editor’s Choice

Pompeian USDA Organic Smooth Extra Virgin Olive Oil, Contains Polyphenol…

13. Spinach and Tomato Frittata

Imagine starting your day with a warm, delicious frittata that’s not only dairy-free but also packed with nutrients. This Spinach and Tomato Frittata is perfect for anyone, especially athletes looking for that extra protein boost. With vibrant spinach and juicy cherry tomatoes, it’s a dish that bursts with flavor, whether you enjoy it fresh out of the oven or chilled from the fridge.
Preparing this frittata is a breeze. In just half an hour, you can have a nourishing meal ready to go. It’s an excellent option for meal prep, so you can grab a slice whenever hunger strikes. Plus, with minimal ingredients and simple steps, you won’t break the bank or spend hours in the kitchen.
Here’s what you need to make this delightful frittata:
Ingredients:
– 4 eggs
– 1 cup spinach, fresh
– 1 cup cherry tomatoes, halved
– 1/2 onion, chopped
– Salt and pepper to taste
Instructions:
1. Preheat your oven to 375°F (190°C). In an oven-safe skillet, sauté the chopped onion until it’s translucent and fragrant.
2. Add in the fresh spinach and halved cherry tomatoes. Cook until the spinach wilts, making the kitchen smell amazing.
3. In a bowl, whisk together the eggs, salt, and pepper. Pour this mixture over the sautéed veggies.
4. Bake for about 20 minutes or until the frittata is set and slightly golden on top.
Want to add a cheesy flavor without the dairy? Just sprinkle in some nutritional yeast before baking!
FAQs:
– Can I use egg substitutes? Yes! Flax eggs are a great alternative for this recipe.
– How can I store leftovers? Keep them in an airtight container in the fridge for up to 3 days.
This frittata is not just a meal; it’s a versatile dish you can adapt to your taste. Enjoy it warm for breakfast or cold on a picnic. It’s the kind of recipe that makes healthy eating easy and enjoyable!
Spinach and Tomato Frittata
Editor’s Choice

Bragg Premium Nutritional Yeast Seasoning – Vegan, Gluten Free – Good So…

DELARLO Tri-Ply Stainless Steel Frying Pan, All Cooktops Compatible Up t…

NOW Foods, Organic Golden Flax Seed Meal, Source of Essential Fatty Acid…
14. Cauliflower Rice with Herbs

Transform your meals with this delightful Cauliflower Rice with Herbs. This dish is not just light and fluffy; it’s a healthy substitute for traditional rice. Imagine enjoying the fresh aroma of herbs mingling with the nutty flavor of sautéed cauliflower. It’s perfect alongside grilled meats or as a colorful base for a plant-based bowl. Best of all, it’s low in calories and packed with flavor, making it a go-to for anyone wanting to eat lighter without sacrificing taste.
Let’s dive into how you can whip this up in just 20 minutes! You’ll need only a handful of ingredients, and it’s super easy to prepare. Plus, you can make it ahead of time and store it in the fridge for up to three days. This means you can enjoy healthy meals throughout the week with minimal effort.
Here’s how to make it:
Ingredients:
– 1 head of cauliflower, grated
– 1/4 cup parsley, chopped
– 1/4 cup cilantro, chopped
– 1 tablespoon olive oil
– Salt and pepper to taste
Instructions:
1. Heat the olive oil in a skillet over medium heat.
2. Add the grated cauliflower and sauté for about 5-7 minutes until it’s tender.
3. Mix in the chopped parsley and cilantro, along with salt and pepper before serving.
Want to kick it up a notch? Add minced garlic and diced onion during the sautéing step for an extra burst of flavor!
This dish is not only quick to prepare but also budget-friendly. Cauliflower is often inexpensive, and fresh herbs can be grown at home or bought at local markets. Enjoy this herb-infused cauliflower rice as a delightful, nutritious addition to your meals. It’s perfect for impressing guests or simply treating yourself to something special.
• Use fresh herbs to elevate the flavor
• Store leftovers in an airtight container for 3 days
• Experiment with spices like cumin or paprika
• Pair with grilled veggies for a complete meal
Cauliflower Rice with Herbs
Editor’s Choice

Lundberg Value Size Regenerative Jasmine Rice 17.3 OZ
9 Herb Indoor Garden Kit – Unique Kitchen Gift for Women, Men, Mom, Frie…
Airtight Food Storage Containers with Lids, Vtopmart 24 pcs Plastic Kitc…
15. Mediterranean Buddha Bowl

Dive into the flavors of the Mediterranean with this delightful Buddha bowl. It’s a vibrant, wholesome meal that combines grains, fresh veggies, and protein all in one easy-to-make dish. Imagine the nutty taste of quinoa or brown rice paired with colorful roasted vegetables and crispy chickpeas, topped off with a creamy tahini drizzle. This bowl is not just a feast for your taste buds, but it’s also packed with nutrients, making it perfect for lunch or dinner.
Meal prepping? This Buddha bowl is your new best friend! You can make a big batch and enjoy it throughout the week. Plus, it’s customizable, so feel free to swap in your favorite ingredients. Pinterest is buzzing with Buddha bowls, and once you try this recipe, you’ll see why they’re so popular!
Let’s get cooking! Start by preparing your base grain. You can use either brown rice or quinoa, both of which are easy to cook and full of fiber. Next, roast your veggies—think colorful bell peppers, zucchini, or even sweet potatoes for a twist. Toss them in olive oil and bake until they’re tender and caramelized.
Want to save time? Use frozen veggies! Just adjust the roasting time to ensure they cook through. Finally, layer everything in a bowl, add chickpeas for protein, and drizzle with tahini mixed with lemon juice, salt, and pepper for that extra zing.
Recipe Overview:
– Servings: 2
– Prep Time: 15 minutes
– Cook Time: 25 minutes
– Total Time: 40 minutes
– Calories: 400
Ingredients:
– 1 cup brown rice or quinoa, cooked
– 1 cup roasted vegetables (zucchini, bell peppers, etc.)
– 1 can chickpeas, rinsed
– 1/4 cup tahini
– Lemon juice, salt, and pepper to taste
Instructions:
1. Cook brown rice or quinoa according to package instructions.
2. Toss your chosen veggies with olive oil and roast at 400°F (200°C) for 20 minutes, until they are golden.
3. In a bowl, layer the cooked rice or quinoa, roasted veggies, and chickpeas. Drizzle with tahini sauce and add lemon juice, salt, and pepper to taste.
Feel free to add avocado for a creamy texture, or choose different grains to mix things up! This bowl is not just filling; it’s also a canvas for your culinary creativity. Enjoy your nourishing meal that’s as good for your body as it is for your taste buds!
Mediterranean Buddha Bowl
Editor’s Choice

50 Pack (100-Piece) 32 oz Meal Prep Containers Reusable with Lids 3-Comp…

Ziyad Premium Hummus with Tahini Sauce, Chick Pea Dip, 100% All-Natural,…

BetterBody Foods Organic Quinoa, Vegan, Gluten Free, Low Glycemic Rice R…
16. Baked Ratatouille

Picture a dish that’s not only a feast for the eyes but also a burst of flavors. Baked ratatouille brings together a rainbow of vegetables, all swimming in a delicious tomato sauce. This vibrant meal is perfect as a side or a main dish, loaded with nutrients. You can enjoy it solo, or pair it with grains like quinoa or brown rice for a hearty dinner that satisfies.
Here’s how to make your own baked ratatouille. It’s super simple and budget-friendly, making it a go-to recipe for weeknight dinners. Plus, it’s a great way to use up vegetables you might have on hand. The warm, comforting flavors make every bite feel like a hug on a plate.
Recipe Overview:
– Servings: 4
– Prep Time: 20 minutes
– Cook Time: 40 minutes
– Total Time: 1 hour
– Calories: 250
Ingredients:
– 1 eggplant, sliced
– 2 zucchinis, sliced
– 2 bell peppers, sliced
– 1 can diced tomatoes
– 2 cloves garlic, minced
– Olive oil, salt, and pepper to taste
Instructions:
1. Preheat your oven to 375°F (190°C). Grab a baking dish and layer the eggplant, zucchini, and bell peppers.
2. In a bowl, combine the diced tomatoes, minced garlic, olive oil, salt, and pepper. Mix it well, then pour this tomato mixture over the layered veggies.
3. Bake in the preheated oven for about 40 minutes. You’ll know it’s ready when the vegetables are tender and fragrant.
Let it cool for a few minutes before serving. This waiting period helps the flavors meld beautifully, enhancing your dining experience!
FAQs:
How do I store leftovers? Store any leftovers in an airtight container in the fridge. They’ll stay fresh for up to three days. Enjoy this dish as a warm side or cold salad for lunch the next day!
This baked ratatouille is not just a dish; it’s an experience. It reminds you of sunny Mediterranean days, even when you’re cooking at home. Enjoy the flavors and the satisfaction of creating something so delightful!
Baked Ratatouille
Editor’s Choice

DOWAN Casserole Dish, 9×13 Ceramic Baking Dish, Large Lasagna Pan Deep f…

OXO Good Grips Handheld Mandoline Slicer for Kitchen, Adjustable Vegetab…
AOZITA 17oz Glass Olive Oil Bottle Dispenser – 500ml Green Oil and Vineg…
17. Mediterranean Grain Salad

Imagine enjoying a vibrant and hearty Mediterranean grain salad that delights your taste buds. This dish brings together chewy farro or barley, crisp vegetables, and a tangy dressing. It’s a perfect choice for a light lunch or as a side dish that packs a punch. Plus, it’s filled with fiber and nutrients, making it an excellent option for refueling after a workout. You might find you feel energized and satisfied after just one bowl!
Ready to make this delicious salad? Here’s what you need:
Recipe Overview:
– Servings: 4
– Prep Time: 15 minutes
– Cook Time: 30 minutes
– Total Time: 45 minutes
– Calories: 220 per serving
Ingredients:
– 1 cup farro or barley, cooked
– 1 cup diced cucumber
– 1 cup cherry tomatoes, halved
– 1/4 cup red onion, diced
– 1/4 cup olive oil
– Juice of 1 lemon
– Salt and pepper to taste
Instructions:
1. In a large bowl, mix the cooked farro or barley with the cucumber, tomatoes, and onion.
2. In a separate bowl, whisk together the olive oil, lemon juice, salt, and pepper to create the dressing.
3. Pour the dressing over the salad and toss everything together. Serve chilled or at room temperature for the best flavor!
Want to add a twist? If you’re not strictly dairy-free, sprinkle some feta cheese on top for an extra flavor boost!
FAQs:
– Can I make this ahead? Yes, this salad stays fresh in the fridge for up to 3 days. Just store it in an airtight container for easy meals throughout the week!
This Mediterranean grain salad is not just healthy; it’s a colorful, satisfying meal that you can whip up in no time. Enjoy every bite!
Mediterranean Grain Salad
Editor’s Choice

Pompeian Robust Extra Virgin Olive Oil, Contains Polyphenols, First Cold…

HOMBERKING 10 Pack Borosilicate Glass Meal Prep Containers with Locking …
18. Tahini Roasted Brussels Sprouts

Looking for a quick and tasty side dish? These Tahini Roasted Brussels Sprouts are just what you need! They are not only simple to make but also loaded with flavor. The creamy tahini coats the Brussels sprouts beautifully, while roasting them brings out a sweet, nutty taste that’s hard to resist. Pair them with any Mediterranean meal, and you’ll have a colorful, nutritious dish on your table.
Whether you’re hosting a dinner party or just cooking for yourself, these roasted sprouts are sure to impress. Plus, they’re an easy way to pack in some healthy greens. Let’s dive into the recipe so you can whip them up tonight!
Recipe Overview:
– Servings: 4
– Prep Time: 10 minutes
– Cook Time: 25 minutes
– Total Time: 35 minutes
– Calories: 180
Ingredients:
– 1 lb Brussels sprouts, halved
– 1/4 cup tahini
– 2 tablespoons olive oil
– Salt and pepper to taste
– Optional: Lemon for squeezing over the top
Instructions:
1. Preheat your oven to 400°F (200°C). This high heat will make your sprouts crispy.
2. In a large bowl, toss the halved Brussels sprouts with tahini, olive oil, salt, and pepper. Make sure they are well coated.
3. Spread the mixture onto a baking sheet in a single layer. This helps them roast evenly.
4. Roast in the preheated oven for about 25 minutes. They should be golden brown and crispy on the outside.
5. For a burst of flavor, squeeze fresh lemon juice over the sprouts before serving.
These sprouts are not just great on their own. You can also use them in salads, grain bowls, or as a topping for hummus. If you don’t have Brussels sprouts on hand, try using broccoli or cauliflower instead. They’ll roast up just as well!
• Toss with garlic for added flavor.
• Serve hot for the best texture.
• Experiment with spices like paprika or cumin.
• Pair with a tahini sauce for dipping.
Enjoy your delicious, nutritious side dish!
Tahini Roasted Brussels Sprouts
Editor’s Choice

Pompeian Robust Extra Virgin Olive Oil, Contains Polyphenols, First Cold…

GoodCook Everyday Nonstick Carbon Steel Baking Sheet Set, 3 Pack – Small…
19. Cucumber and Tomato Salad

Brighten up your meal with a zesty cucumber and tomato salad! This dish is not only refreshing but also an effortless way to add a pop of color and flavor to any Mediterranean feast. Imagine biting into crisp cucumbers and juicy tomatoes, all kissed by the sunlight. With fresh herbs and a tangy lemon dressing, this salad is perfect for summer gatherings or as a light lunch. It’s hydrating and packed with nutrients, making it a delightful choice any time of year.
Let’s get straight to the recipe. You’ll need just a few fresh ingredients, and the prep takes only 10 minutes! Here’s how to whip it up:
Recipe Overview:
– Servings: 4
– Prep Time: 10 minutes
– Cook Time: 0 minutes
– Total Time: 10 minutes
– Calories: 100
Ingredients:
– 2 cucumbers, diced
– 2 cups cherry tomatoes, halved
– 1/4 cup parsley, chopped
– Juice of 1 lemon
– 2 tablespoons olive oil
– Salt and pepper to taste
Instructions:
1. In a large bowl, toss together the diced cucumbers, halved cherry tomatoes, and chopped parsley.
2. Drizzle the mixture with fresh lemon juice and olive oil.
3. Season with salt and pepper to taste. Toss gently to combine all the flavors.
4. Serve immediately for the best taste and crunch. If you want an extra chill, pop it in the fridge for about 30 minutes before serving!
Want to switch things up? You can add red onions for a bit of crunch and flavor. Enjoy this salad as a side dish or a light meal. It’s a crowd-pleaser that’s sure to impress!
• Use fresh herbs for a burst of flavor
• Chill before serving for a refreshing taste
• Add red onions for extra crunch
• Pair with grilled veggies for a complete meal
Cucumber and Tomato Salad
Editor’s Choice

OXO Good Grips Salad Spinner | Lettuce Spinner | Fruit Washer | Fruit Wa…

Olive Oil Dispenser Bottle, 2 Pcs Glass Olive Oil Dispenser and Vinegar …

Herb Scissors Set – Updated 2025 Cool Kitchen Gadgets for Cutting Fresh …
20. Roasted Garlic and Lemon Asparagus

Roasted garlic and lemon asparagus is a delightful side dish that can elevate your meals with ease. The rich aroma of roasted garlic pairs beautifully with the zingy flavor of fresh lemon, creating a dish that’s both simple and satisfying. This vibrant combination ensures your asparagus stays tender-crisp, making it a perfect partner for grilled chicken or fish. Whether you’re prepping for a busy week or looking for a quick side for a dinner party, this recipe is a must-have.
Here’s how to make it! It only takes about 25 minutes from start to finish, making it an excellent option for anyone short on time. You can whip this up while your main dish cooks, ensuring everything is served hot and fresh. Plus, it’s budget-friendly, with just a few simple ingredients that you likely already have in your kitchen.
Recipe Overview:
– Servings: 4
– Prep Time: 10 minutes
– Cook Time: 15 minutes
– Total Time: 25 minutes
– Calories: 80
Ingredients:
– 1 lb asparagus, trimmed
– 3 tablespoons olive oil
– 3 cloves garlic, minced
– Juice of 1 lemon
– Salt and pepper to taste
Instructions:
1. Preheat your oven to 400°F (200°C).
2. In a bowl, toss the asparagus with olive oil, minced garlic, lemon juice, salt, and pepper until well coated.
3. Spread the asparagus in a single layer on a baking sheet.
4. Roast in the oven for 15 minutes, or until the asparagus is tender and slightly crispy.
5. For an extra pop of flavor, squeeze fresh lemon juice over the asparagus just before serving.
Can you grill this instead? Absolutely! Grilling adds a smoky flavor that complements the garlic and lemon beautifully. Just toss the asparagus on a hot grill, turning occasionally, until tender.
Enjoy your roasted garlic and lemon asparagus as a tasty side that brings color and flavor to your table. It’s not just food; it’s a simple way to impress your family and friends!
Roasted Garlic and Lemon Asparagus
Editor’s Choice
Olive Oil Dispenser Bottle, 2 Pcs Glass Olive Oil Dispenser and Vinegar …

Kitessensu High Effective Garlic Press With Studs, Heavy Duty Garlic Min…
GoodCook Everyday Nonstick Carbon Steel Baking Sheet Set, 3 Pack – Small…
21. Charred Corn and Avocado Salad

This Charred Corn and Avocado Salad is a burst of flavor that will brighten up any meal. You’ll love how the sweet, smoky corn pairs with creamy avocado. A splash of lime and a sprinkle of fresh cilantro add a zesty finish that makes every bite delightful. It’s not just a side dish; it can be a refreshing light lunch that fuels your body with wholesome ingredients.
The beauty of this dish lies in its simplicity and speed. You can whip it up in just 25 minutes, making it an ideal choice for busy days or unexpected guests.
Here’s how to make it:
Recipe Overview:
– Servings: 4
– Prep Time: 10 minutes
– Cook Time: 15 minutes
– Total Time: 25 minutes
– Calories: 210
Ingredients:
– 2 cups corn, either grilled or roasted
– 2 ripe avocados, diced
– 1/4 cup fresh cilantro, chopped
– Juice of 1 lime
– Salt and pepper to taste
Instructions:
1. In a large bowl, combine the grilled corn, diced avocados, and chopped cilantro.
2. Squeeze the lime juice over the mixture and season with salt and pepper to taste.
3. Gently toss everything together until well mixed.
4. Serve immediately for the best flavor and freshness.
Want a little heat? Add diced jalapeño to give it a spicy twist!
FAQs:
Can I use canned corn? Yes, but fresh corn brings a much better taste and texture!
This salad is not just tasty; it’s also versatile. Pair it with grilled chicken or fish for a complete meal, or enjoy it on its own for a light snack. You’ll find yourself reaching for this recipe again and again.
Charred Corn and Avocado Salad
Editor’s Choice
Pompeian Robust Extra Virgin Olive Oil, Contains Polyphenols, First Cold…

Herb Scissors Set,Multipurpose 5 Blade Kitchen Herb Cutter with Safety C…
22. Herb and Garlic Grilled Chicken

Are you ready to enjoy a juicy and flavorful meal that fits perfectly into your Mediterranean diet? This Herb and Garlic Grilled Chicken recipe is a fantastic choice! The combination of fresh herbs, garlic, and olive oil creates a delicious marinade that keeps the chicken tender and bursting with flavor. Whether you’re planning meal prep for the week or firing up the grill for a summer barbecue, this dish is sure to impress.
Pair this grilled chicken with some vibrant veggies or toss it into a fresh salad for a complete meal that will help you reach your fitness goals. Plus, it’s easy to make! Let’s dive into how you can whip this up in no time.
Here’s what you’ll need to get started:
Ingredients:
– 4 chicken breasts
– 1/4 cup olive oil
– 4 cloves garlic, minced
– 1 tablespoon fresh rosemary, chopped
– 1 tablespoon fresh thyme, chopped
– Salt and pepper to taste
Instructions:
1. In a medium bowl, combine the olive oil, minced garlic, rosemary, thyme, salt, and pepper. This will be your marinade.
2. Add the chicken breasts to the bowl and coat them well with the marinade. Cover and let them marinate for at least 30 minutes in the fridge. The longer, the better!
3. Preheat your grill to medium-high heat. Grill the chicken for 6-7 minutes on each side until fully cooked and the juices run clear. Aim for an internal temperature of 165°F.
4. Once done, let the chicken rest for a few minutes before slicing. This helps keep it juicy!
Enjoy your flavorful chicken on its own or as part of a colorful salad.
FAQs: Can I use chicken thighs? Absolutely! They’ll add even more juiciness to your meal!
This dish is not only simple but also a great way to introduce more protein into your diet while keeping things dairy-free. Try it today, and savor the taste of the Mediterranean!
Herb and Garlic Grilled Chicken
Editor’s Choice

TrendPlain 16oz/470ml Glass Olive Oil Sprayer for Cooking – 2 in 1 Olive…

Cole & Mason Fresh Herb Keeper – Acrylic Storage Container for Refrigera…

Alpha Grillers Meat Thermometer Digital – Instant Read Food Thermometer …
23. Moroccan Spiced Carrot Salad

Brighten your meal with a Moroccan spiced carrot salad. This dish offers a delightful twist to your Mediterranean diet by blending the sweetness of fresh carrots with an array of warm spices. The zesty lemon vinaigrette adds a refreshing kick, making it perfect for any occasion. Serve it alongside grilled meats or enjoy it solo as a light lunch. It’s a fantastic option for picnics or as a side dish at gatherings.
Here’s how to make this easy and tasty salad. You’ll need just a few ingredients and 15 minutes to whip it up. This recipe not only tantalizes your taste buds but also brings a vibrant pop of color to your table.
Recipe Overview:
– Servings: 4
– Prep Time: 15 minutes
– Cook Time: 0 minutes
– Total Time: 15 minutes
– Calories: 150
Ingredients:
– 4 cups grated carrots
– 1/4 cup raisins
– 1/4 cup chopped almonds
– 1 teaspoon cumin
– Juice of 1 lemon
– Olive oil, salt, and pepper to taste
Instructions:
1. In a large mixing bowl, combine the grated carrots, raisins, chopped almonds, and cumin.
2. Squeeze the lemon juice over the mixture, then drizzle with olive oil.
3. Season with salt and pepper to your liking.
4. Toss everything together until well mixed. Serve immediately or let it sit for a bit to allow the flavors to meld.
Want a fun twist? Add a pinch of cinnamon for extra warmth.
FAQs:
How long can you store this salad? It keeps well in the fridge for about three days. Enjoy this colorful salad that’s not only delicious but also easy to make!
Moroccan Spiced Carrot Salad
Editor’s Choice
Olive Oil Dispenser Bottle, 2 Pcs Glass Olive Oil Dispenser and Vinegar …

Umite Chef Mixing Bowls with Airtight Lids Set, 8PCS Stainless Steel Kha…
24. Cilantro Lime Quinoa

Cilantro lime quinoa is a refreshing dish that can transform your meals. Its bright lime flavor and aromatic cilantro take the nutty quinoa to new heights. You’ll love how it complements grilled veggies or proteins. Plus, it’s super easy to whip up, making it a must-try for anyone wanting to spice up their Mediterranean diet!
Imagine serving this zesty quinoa at your next dinner. It’s perfect for gatherings or as a quick weeknight side. In just 25 minutes, you can create a delightful dish that’s not only tasty but also packed with nutrients.
Recipe Overview:
– Servings: 4
– Prep Time: 10 minutes
– Cook Time: 15 minutes
– Total Time: 25 minutes
– Calories: 220
Ingredients:
– 1 cup quinoa, rinsed
– 2 cups vegetable broth
– Juice of 1 lime
– 1/4 cup cilantro, chopped
– Salt to taste
Instructions:
1. Start by bringing the vegetable broth to a boil in a medium pot.
2. Add the rinsed quinoa, cover, and let it simmer for 15 minutes until tender.
3. Once cooked, fluff the quinoa with a fork and mix in the lime juice, chopped cilantro, and salt.
4. Serve it warm or at room temperature for a refreshing side dish.
You can pair this quinoa with grilled chicken, fish, or even roasted vegetables. It’s versatile and full of flavor!
FAQs:
– Can I substitute water for broth? Yes, but using broth enhances the flavor.
This dish not only tastes amazing but also fits perfectly into a healthy diet. Enjoy your culinary adventure with cilantro lime quinoa!
Cilantro Lime Quinoa
Editor’s Choice

Pride Of India – Natural Red Royal Quinoa – 100% Bolivian Superior Grade…

Pacific Foods Organic Low Sodium Vegetable Broth, 32 oz (Pack of 5)

Bonnie Plants Cilantro Live Herb Plants – 4 Pack, Cool Season Annual, Le…
25. Vegan Spanakopita

Imagine biting into a warm, flaky vegan spanakopita that bursts with flavor! This delightful twist on the traditional Greek dish features a savory blend of spinach and aromatic herbs, all wrapped in delicate phyllo pastry. Perfect as an appetizer or a light meal, these golden triangles are sure to impress your family and friends.
Creating this dish is easier than you think. Start by gathering fresh ingredients. The combination of spinach, onions, and pine nuts creates a filling that’s both rich and satisfying. Serve these delectable bites alongside a refreshing vegan tzatziki for an extra touch of flavor.
Here’s how to make your own vegan spanakopita:
Ingredients:
– 1 package phyllo pastry
– 2 cups spinach, chopped
– 1/2 cup onion, chopped
– 1/4 cup pine nuts
– 1 tablespoon dill
– Olive oil, salt, and pepper to taste
Instructions:
1. Preheat your oven to 375°F (190°C). In a pan, sauté the chopped onion in a little olive oil until it turns translucent. Add the spinach and cook until it wilts down.
2. Mix in the pine nuts, dill, and season with salt and pepper to your liking.
3. Take a sheet of phyllo pastry and brush it lightly with olive oil. Place a spoonful of the spinach filling at one end, then fold the pastry over to create a triangle. Keep folding until you reach the end.
4. Place the triangles on a baking sheet and bake for 25 minutes, or until they are golden brown and crispy.
Now, enjoy your homemade vegan spanakopita! You can make these in advance and freeze them before baking. Just take them out when you’re ready for a delicious snack or meal!
• Preheat your oven for perfect baking results.
• Sauté onions first for added depth of flavor.
• Fold phyllo carefully for a flaky texture.
• Serve with vegan tzatziki for a refreshing dip.
Vegan Spanakopita
Editor’s Choice

Athens Foods Mini Fillo Dough Shells 15 Per Box (3 Boxes)

Pompeian USDA Certified Organic Extra Virgin Olive Oil Non-Stick Cooking…
Conclusion

These 25 dairy-free Mediterranean diet recipes are proof that eating healthy doesn’t have to be bland or boring!
With a wealth of flavors from fresh vegetables, grains, and aromatic herbs, they provide the essential nutrients athletes need to power through their workouts.
Try these recipes and discover new favorites that fit seamlessly into your fitness journey while enjoying delicious Mediterranean cuisine.
Note: We aim to provide accurate product links, but some may occasionally expire or become unavailable. If this happens, please search directly on Amazon for the product or a suitable alternative.
This post contains Amazon affiliate links, meaning I may earn a small commission if you purchase through my links, at no extra cost to you.
Frequently Asked Questions
What Are Some Easy Dairy-Free Mediterranean Diet Recipes I Can Try?
If you’re looking for easy and delicious dairy-free Mediterranean diet recipes, you’ve come to the right place! Start with a vibrant chickpea salad tossed with fresh herbs, lemon juice, and olive oil. You can also try quinoa tabbouleh, which is packed with parsley, tomatoes, and cucumbers, all drizzled with tahini for creaminess without dairy. Explore other options like stuffed bell peppers with brown rice and lentils, or a hearty Mediterranean vegetable stew. Each of these recipes is not only simple but also nutritious and filling!
Can I Follow a Dairy-Free Mediterranean Diet as an Athlete?
Absolutely! Following a dairy-free Mediterranean diet can be incredibly beneficial for athletes. The diet emphasizes whole foods, healthy fats, and plenty of plant-based options, providing the necessary nutrients to fuel your workouts. Incorporate foods like legumes, whole grains, and lean proteins like fish and chicken. Don’t forget to add in plenty of fruits and vegetables for vitamins and minerals. With the right planning, you can meet your energy needs and enhance your athletic performance while enjoying tasty Mediterranean meals!
What Are Some Plant-Based Mediterranean Dishes That Are Also Vegan?
There are plenty of delightful plant-based Mediterranean dishes that are also vegan! For starters, try a classic hummus served with pita and fresh veggies, or a roasted vegetable platter drizzled with balsamic glaze. Don’t miss out on falafel served in a wrap with tahini sauce and crunchy pickles. Consider making a zucchini and corn fritter for a delicious snack or meal addition. Each of these dishes is bursting with flavor and perfect for anyone looking to enjoy healthy Mediterranean recipes without dairy!
How Can I Meal Prep Dairy-Free Mediterranean Diet Recipes?
Meal prepping dairy-free Mediterranean diet recipes is a fantastic way to stay organized and make healthy eating easy! Start by selecting a few recipes for the week, focusing on dishes that store well, like vegan pasta salad or chickpea stew. Prepare large batches and portion them into individual containers. Be sure to include a variety of colorful vegetables and whole grains for balanced meals. You can also pre-chop ingredients like herbs and garlic to save time during the week. With some planning, you’ll have ready-to-eat Mediterranean meals at your fingertips!
Are There Any Tips for Making Dairy-Free Mediterranean Meals More Flavorful?
Absolutely! Making dairy-free Mediterranean meals flavorful mainly revolves around using fresh herbs and spices. Try incorporating oregano, cumin, and paprika to elevate your dishes. Don’t forget about lemon juice and olive oil for brightness and richness. You can also use nutritional yeast to add a cheesy flavor to sauces and dressings. Experiment with different vinegars, like red wine or balsamic, to enhance your salads. With these tips, your dairy-free Mediterranean meals will be bursting with flavor!
Related Topics
dairy-free recipes
Mediterranean diet
vegan meals
healthy cooking
plant-based diet
athlete nutrition
easy meal prep
Mediterranean cuisine
quick dinners
nutrient-dense meals
seasonal ingredients
flavorful dishes